How to add a custom label to the main product image on a product page, collection page and a featured collection?
Product badges or product labels – such as Sale, Limited Edition, New In, Recommended – provide additional information about the product as well as help products stand out on collection pages. Some themes have built-in product labels (e.g. Sale), some allow to add one more custom product label through metafields – check out one of my articles about
metafields, and some themes don’t support this feature at all. In this tutorial, I’ll show you how to add:
- a) a product label to the main product image on a product page,
- b) a product label to the main product image on a collection page and a featured collection through a product tag to the Dawn Theme.
Note: Themes vary in the layout and design, hence even though this guide is applicable to other themes, the CCS classes and the code structure will be different. This means that every theme will require some different ajdustments i in the code. In this example, we will add the Limited Edition label to the Dawn Theme.
Add Limited Edition tag your products
Depending on the number of products you have, add Limited Edition tag manually to your products in the Shopify admin, or use the bulk editor or export products in CSV, add the tag to your products and upload the file back to Shopify.
Let’s add the label to the main product image a product page
-
First of all, find the file main-product.liquid. In this file, find the following section:
 <section class="page-width">
   <div class="product grid grid--1-col {% if product.media.size > 0 %}grid--2-col-tablet{% else %}product--no-media{% endif %}">
     <div class="grid__item product__media-wrapper">
       PASTE THE FOLLOWING PIECE OF CODE HERE
-
The following code will make the magic – displaying the label only for products with the Limited Edition tag. Paste the following code as suggested in the previous step.
 {% if product.tags contains 'Limited Edition' %}
   <div class="custom_label">Limited Edition</div>
 {% endif %}
-
Now, we need to add CSS declarations to the custom_label class. I decided to add the label using absolute and relative positioning. This calls for CSS changes in two files. Let’s start with the base.css file.
  .custom_label {
     position: absolute;
     top: 10px;
     right: 10px;
     z-index: 10;
     background-color: pink;
     padding: 0.8rem;
     font-size: 1.2rem;
     color: white;
  }
-
Adding the CSS declarations above will display the label on a wrong position. The problem is that the relative position of the product wrapper isn’t specified. Hence, we need to do that. Find the section-main-product.css file.
  .product__media-wrapper {
     padding-left: 0;
     position: relative; /* ADD THIS CSS DECLARATION! */
}
-
DONE! Reload any product page with a product using the Limited Edition tag and you should see the label in the right corner of the main image. Don’t forget to delete the cache if you can’t see the CSS class. Feel free to redesign the label as you wish. The styling I use is only for the example uses.
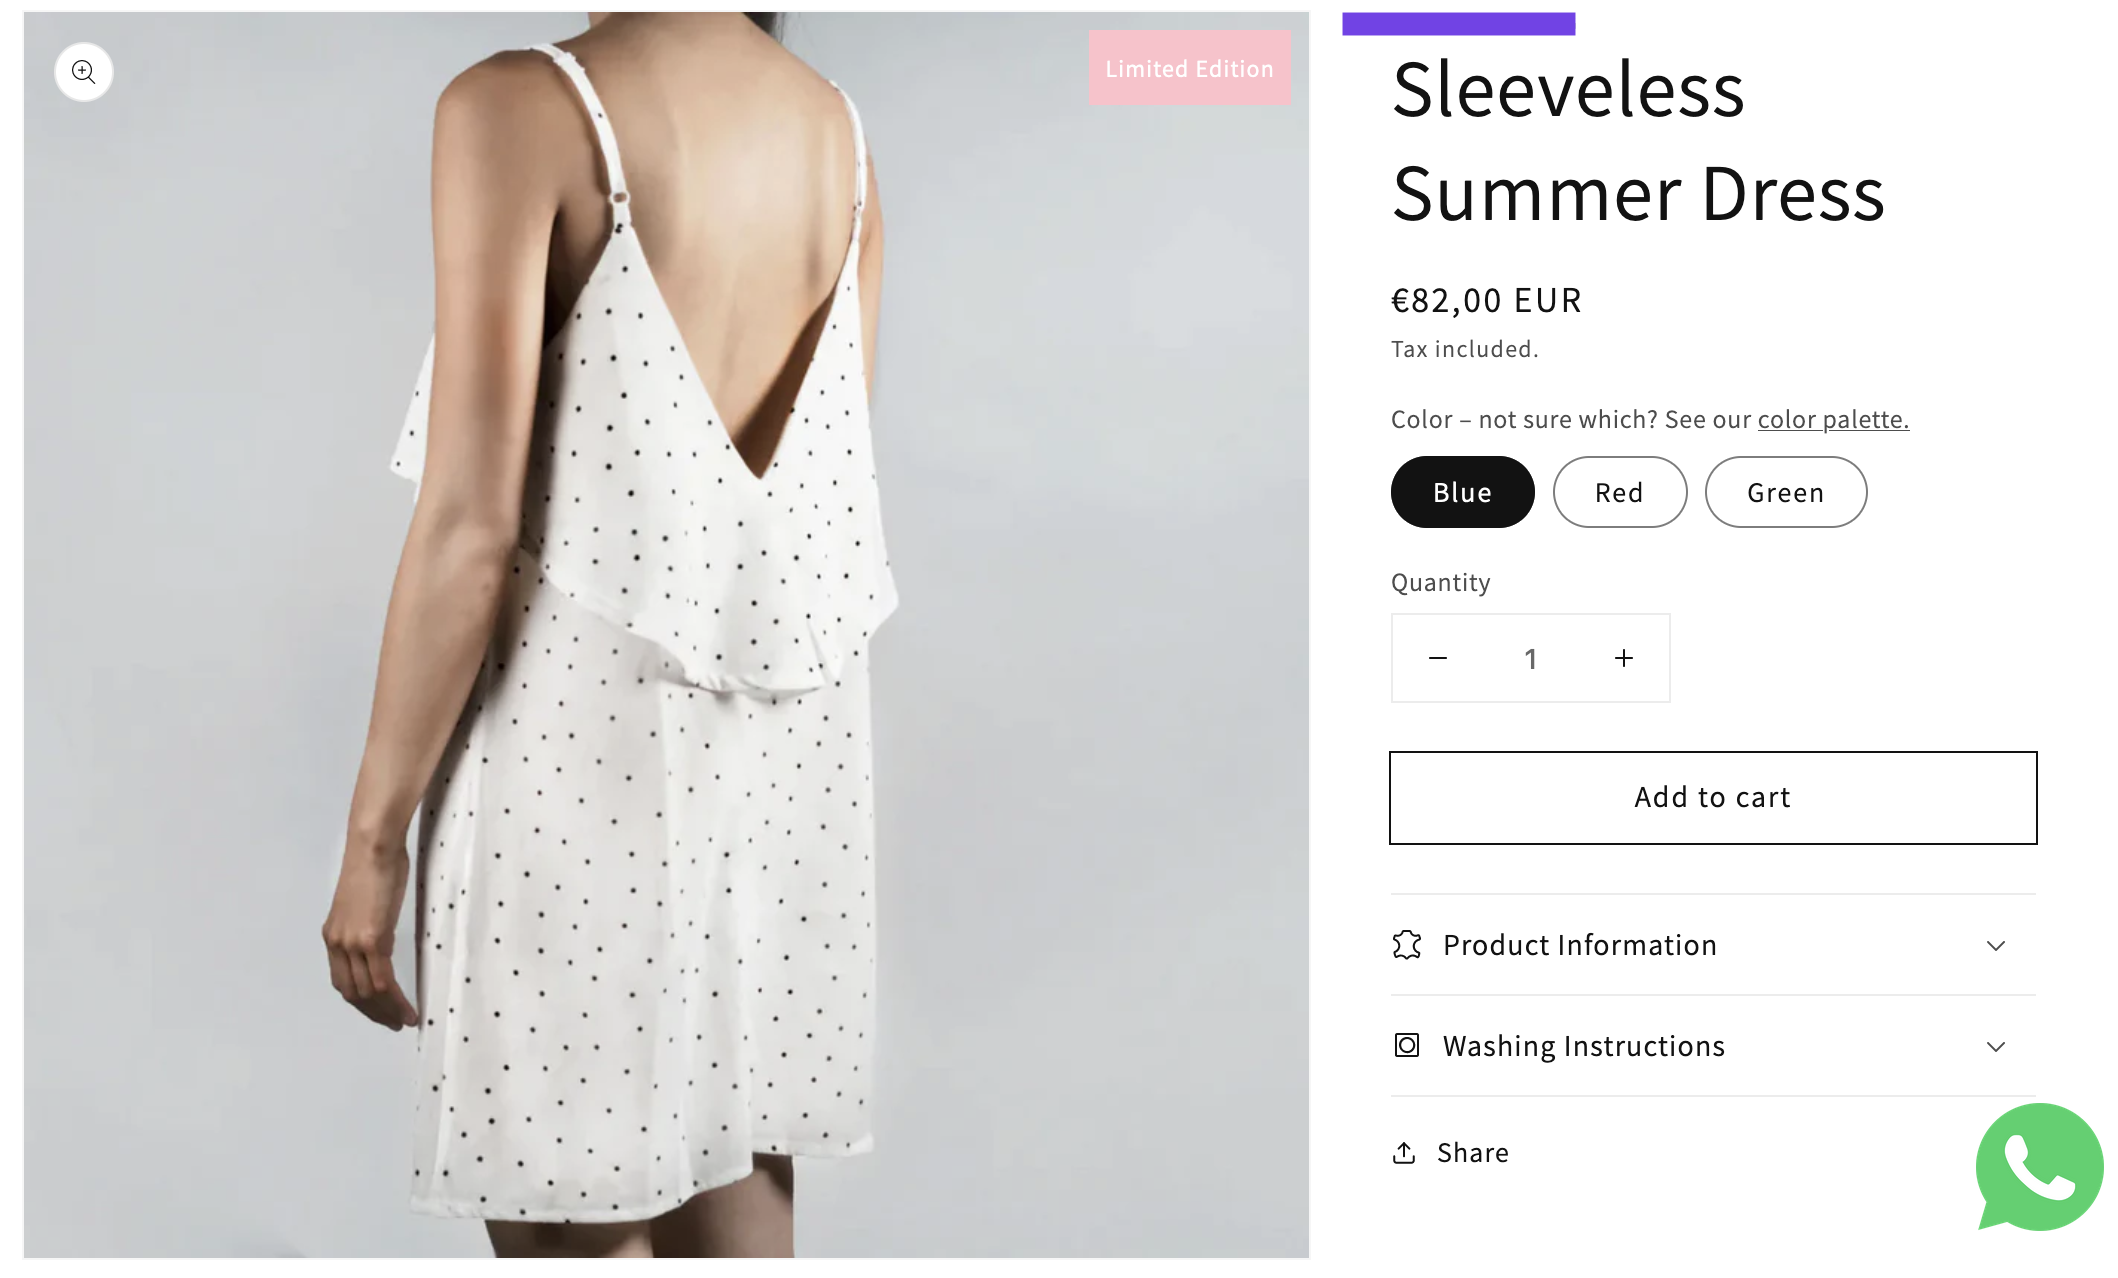
A custom label on a product page
Let’s add the label to the main product image on a collection page and a featured collection
Since the collection page as well as a featured collection renders product-card.liquid snippet, we will do change only in that file and the label will display on both collection page and featured collection.
-
Find the following piece of code in the product-card.liquid snippet.
   <div class="card-wrapper">
     <div class="card-information">
       <div class="card-information__wrapper">
           PASTE THE FOLLOWING PIECE OF CODE HERE
-
Add the following piece of code as suggested in the previous step. This snippet accepts only product_card_product object not product! That’s the reason why you can’t use the same piece of code as for product pages.
   {%- if product_card_product.tags contains 'Limited Edition' -%}
       <div class="custom_label">Limited Edition</div>
   {%- endif -%}
-
In my example, I can use the same CCS class (custom_label) for the collection page and featured page. The only change, which I need to do, is to specify the font color because on collection page and featured page the font color is inherited from the parent element. So, add the following piece of code in the component-product-grid.css file:
  .custom_label {
     color: white;
  }
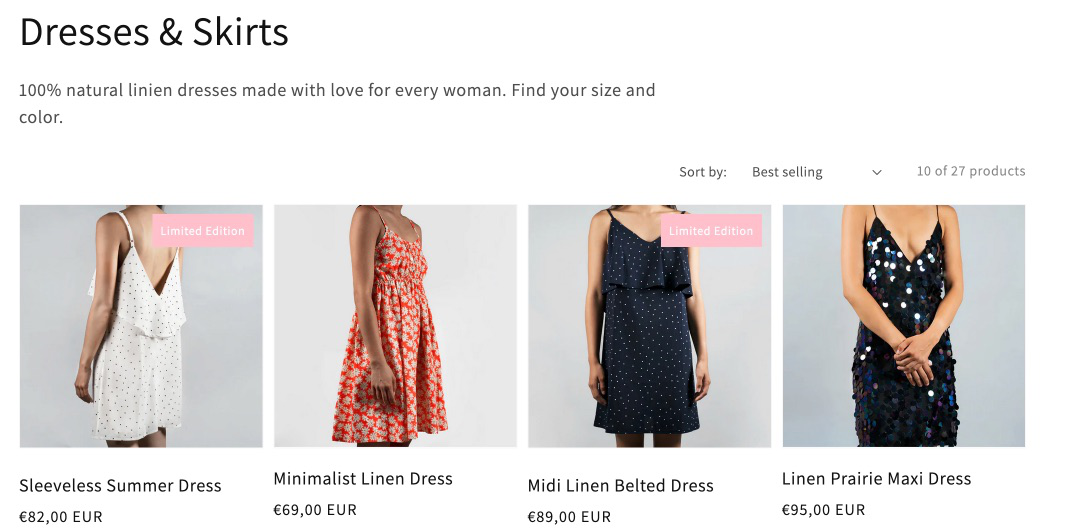
A custom label on a featured collection
To wrap it up, we managed to display a custom label on a product page, collection page as well as on a featured collection.
Important note: You might need to use some more CSS declarations and properties to make sure that the label displays well on different screens! It depends on the width/height of the label, the text, font size, and else. So, make sure that the label renders good on all screens!
If you get stuck in any of the steps, feel free to get in touch with me. I’ll be happy to help you.