Wondering how to add additional information to your product pages? If yes, this is the right article for you. It has become recently so easy to add additional information to product pages (and other pages) thanks to integrated metafields in Shopify. In other words, you no longer need to install any metafields app to your Shopify store.
First of all, let’s explain metafields. Metafields enable you to save additional information that isn’t usually captured in the Shopify admin. This means that e.g. if you need to save some information for your products and display them on your online store, metafields will help you create the magic.
To give you an example, let’s imagine running a store that is selling candles. If you sell candles, you want to inform your customers about the average burn time. However, when adding a new product in your Shopify admin, there is no special field, in which you could insert the burn time information unless you are happy with writing down the burn time information in the product description field.
To display and emphasize the information on your store (e.g. under the product title), then you need to create a metafield.
Follow this guide on how to add a metafield without any app to your Shopify admin and display the metafield value on your online store where you want to.
- Go to your Shopify admin and click Settings.
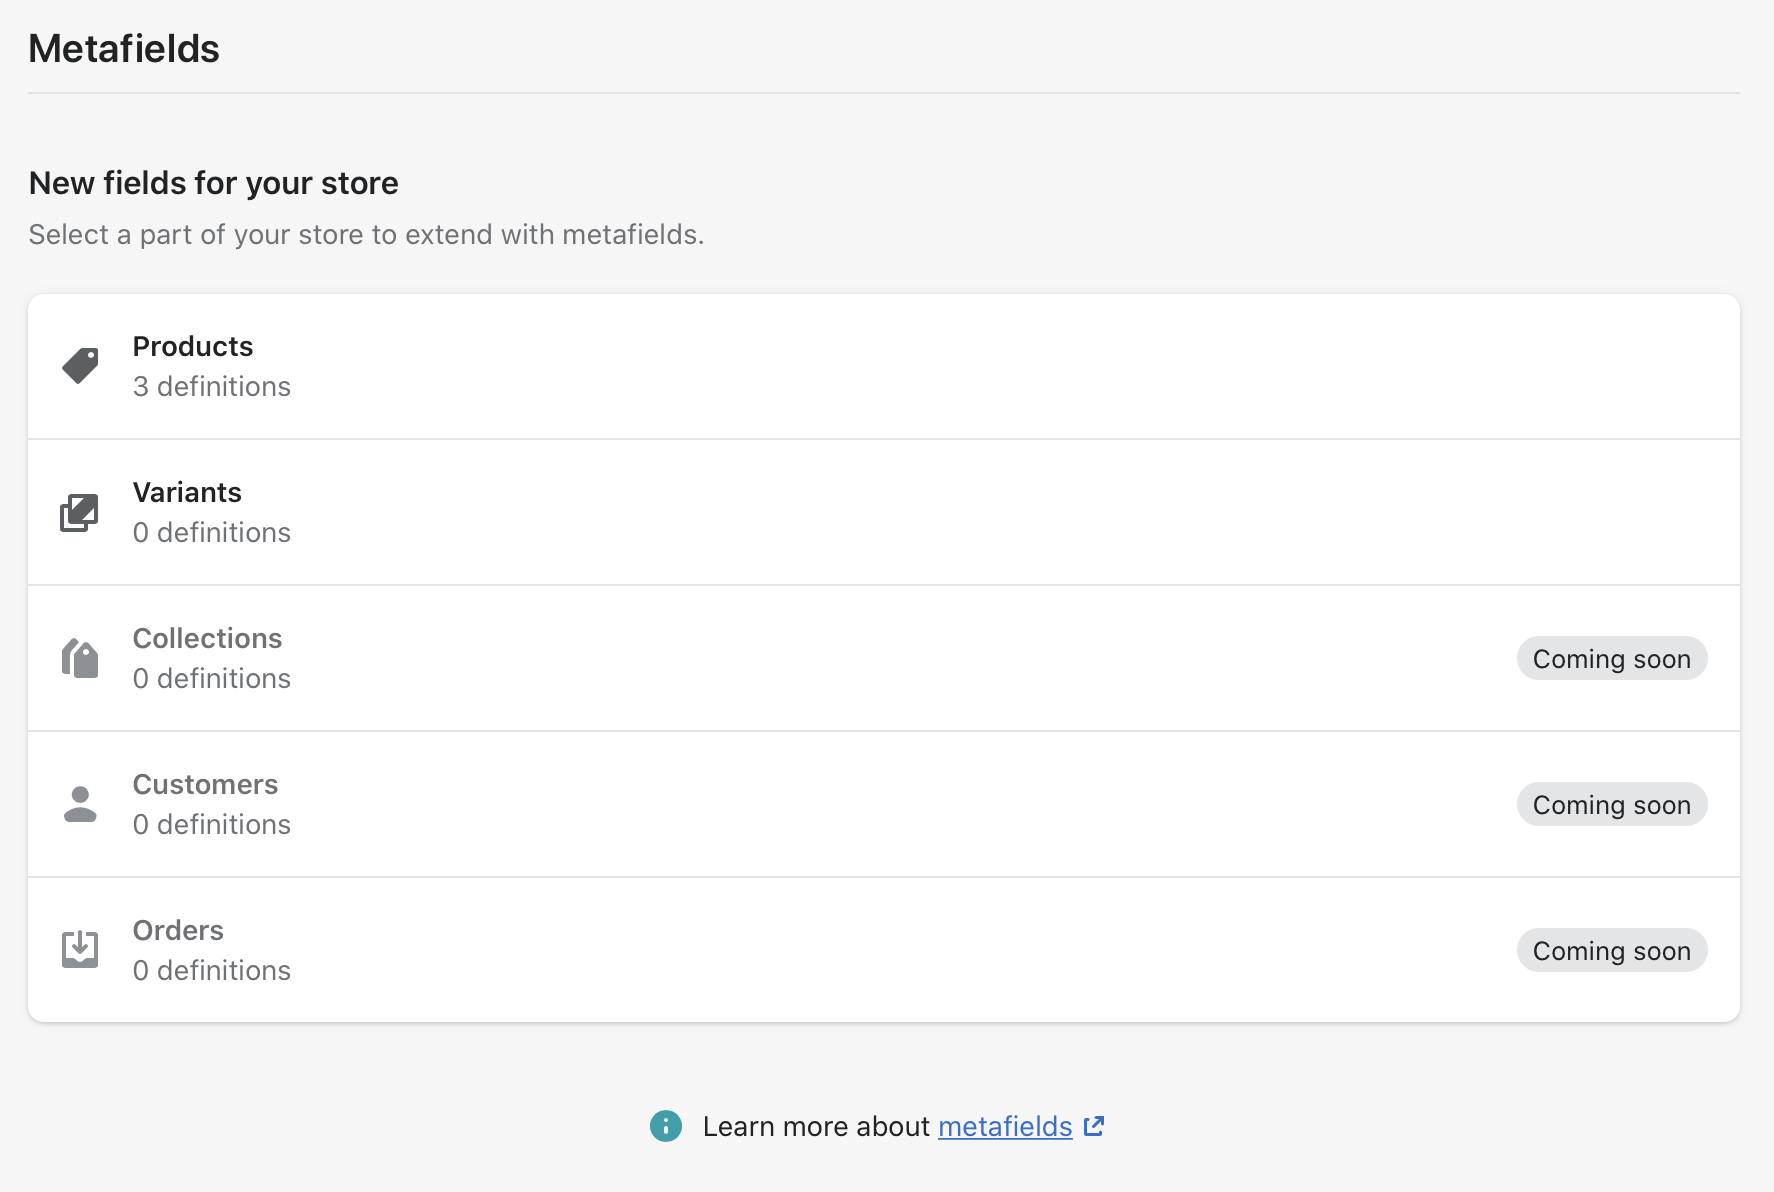
- In the right menu, click Metafields (Custom data) section.
- The screenshot below will show up. You see that metafields are available only for Products and Variants right now (collections, customers and orders will be coming soon).
Note: Update April 2023 – metafields are available for locations and markets! Thank you Shopify!
Note: Update February 2023 – rich text metafield type is available! Great, great, great! Thank you Shopify!
Note: Update April 2022 – metafields are available for products, collections, customers, orders, pages, blogs and blog posts! That’s awesome! Thank you Shopify!
Note: Update January 2022 – metafields are available for products, collections, customers and orders! Huray!
- Click Products.
-
Click Add definition.
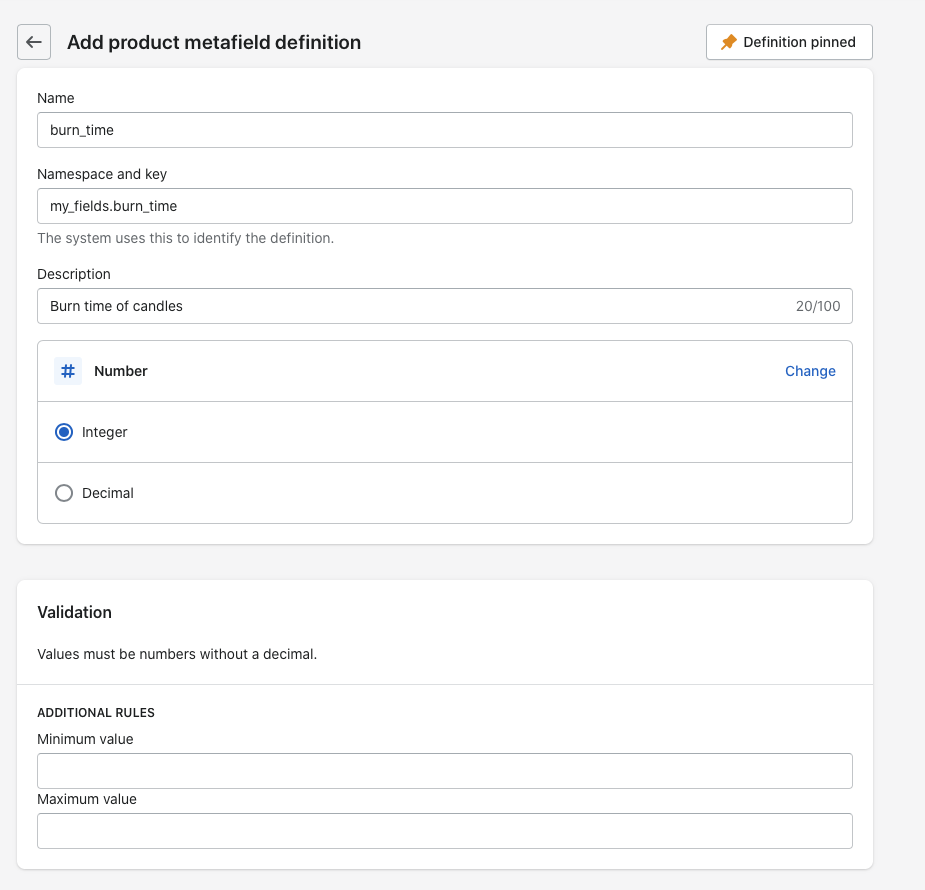
- Name your metafield – we will name it burn_time (the candle example).
- Namespace and key – you can leave it as it is.
- Description – not required, but it’s worth writing a few words about the metafield.
- Select content type – this is very important! You need to inform Shopify what content type the metafield is going to be. You can choose out of these:
- Single line text
- Multi line text
- Rich text (NEW February 2023!)
- Integer
- Decimal
- Product
- Product variant
- File
- Page
- Collection
- Metaobject
- Date
- Date and time
- Weight
- Volume
- Dimension
- Color
- JSON
- Mixed reference
- Rating
- True or false
- URL
- Money
- For the candle example, we will choose Integer.
- When done, click save.
- Head over to the Products in the Shopify admin.
- Choose any product you’d like to save the additional information for.
- If you scroll to the bottom, you will see the metafields option there (see the screenshot).
- Fill in the value for the specific product (e.g. 4). Please don’t write anything else apart from the number. We will do it in the code.

Themes 2.0 (updated December 2022!)
Follow this guide on how to render product metafields on product pages when using Shopify 2.0 themes. The example is shown on Dawn theme.
In the second half of 2022, Shopify enabled to insert the metafield values dynamically through the “Customize” theme option instead of making changes in the code files. To render the burntime information on the product page, follow these steps:
- Go to Shopify admin -> Themes
- Choose a theme you would like to add the metafield for and click “Customize”.
- In the upper dropdown menu, choose “Products” and select a product template.
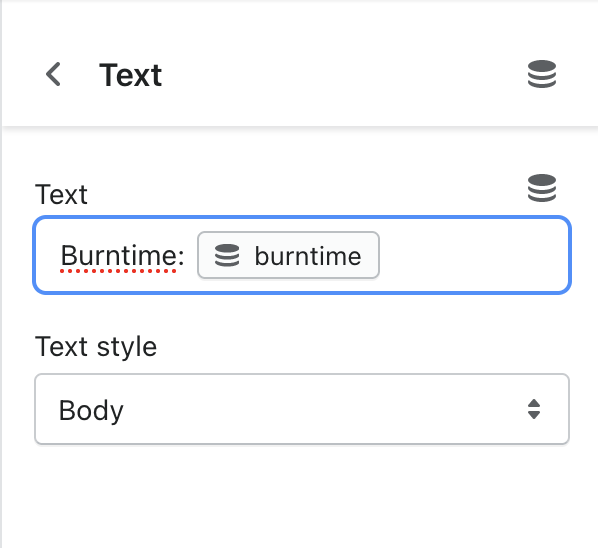
- In the “Product information section”, add a new text block.
- Click the dynamic icon and insert the dynamic source “burntime”.
- You can add additional text to the text field and move the block along the section on the product page.
- Save the changes.
Adding a custom block (or a section)
This is another option on how to display the metafield values on the storefront. This option calls for some basic development skills. In our case, we can definitely insert the metafield values dynamically instead of creating a new block, however, in some more advanced cases with customizations, adding a new block or section is inevitable. We explain the solution on the same example with the candles.
Add a new block
To display the metafield values on the product pages, we need to create a new block firstly, which you can easily move along the product pages and place it, where you like it most.
- Go to Shopify admin -> Themes -> Edit themes
- Find main-product.liquid file (not JSON file).
- Add a new block in schema section. Since we just want to display information stored in the metafield definition, we’re not adding further customizations. If you wish to add heading, rich text or anything else, feel free to do so!
    {
      "type": "metafield_burn-time",
      "name": "Metafield burn time,
      "limit": 1
    },
Render the block on product pages
Now, we need to render the block on the product pages using the when statement.
- Scroll up in the same file (main-product.liquid).
- Add the block in the code (by using when statement).
- Use theme’s or custom CSS so that the metafield block fits well in the theme’s layout.
    {%- when 'metafield_burn-time' -%}
      <div class="h4">
        {{ product.metafields.my_fields.burn_time}}
      </div>
- Go to Shopify Admin -> Customize -> Product pages.
- In the left menu, add a new block. In the list of available blocks, you should see Metafield burn time block.
- If you have already added the metafield value to the product you’re viewing now, you should already see the burn time information being displayed on the product page.
Vintage themes
See how to render the metafield values on vintage themes, which are themes that you previous (original) Shopify architecture.
Rendering the metafield value on the product page
Alright, now we have everything what we need. The only remaining thing is to render the metafield value on the product page.
- Go to your Shopify admin and click Online store.
- In the current theme section, click the dropdown menu Actions and choose Edit code option.
- Find the corresponding product file (depends on the theme you’re using). In many cases, the main product file is called product-template.liquid or main-product.liquid,…).
- Find the relevant section, in which you would like to render the metafield value.
-
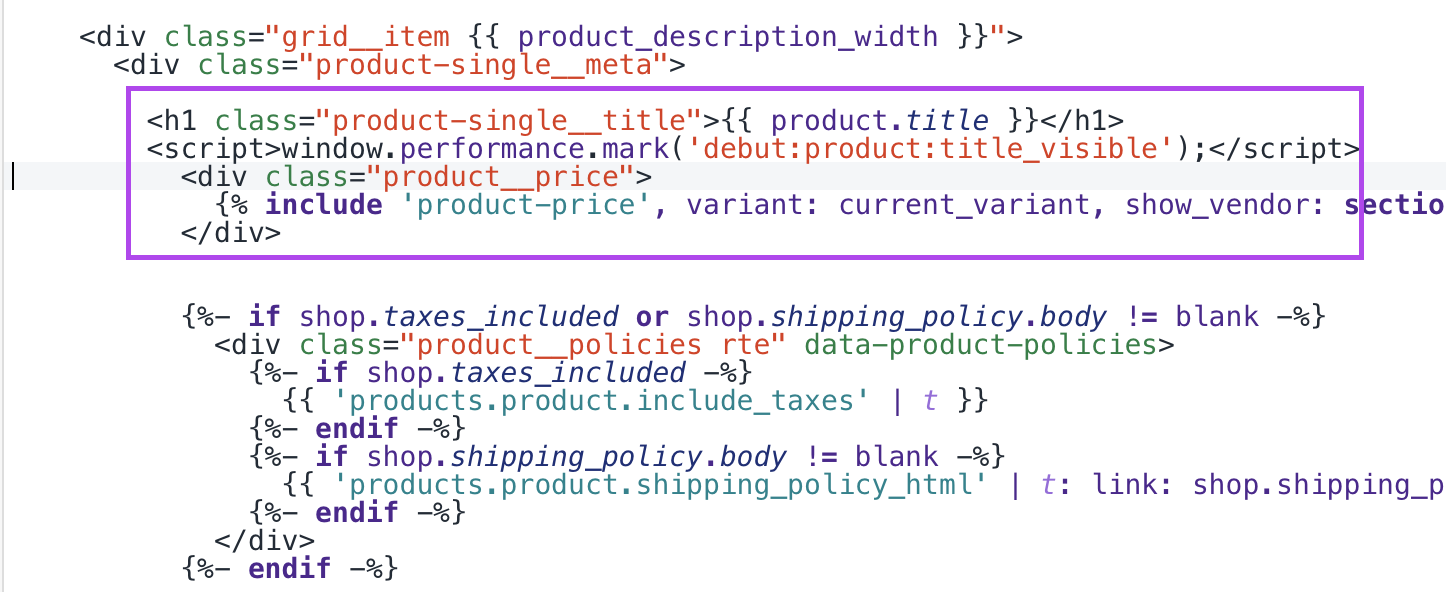
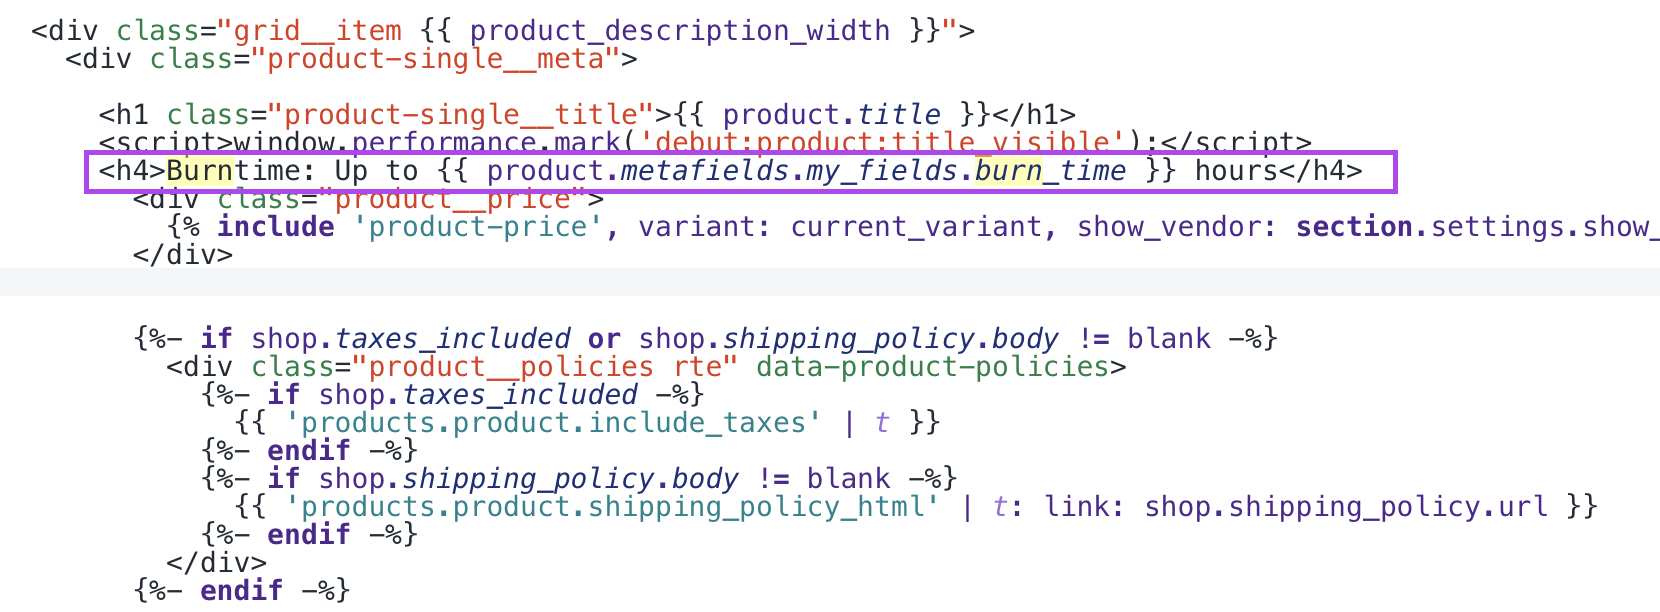
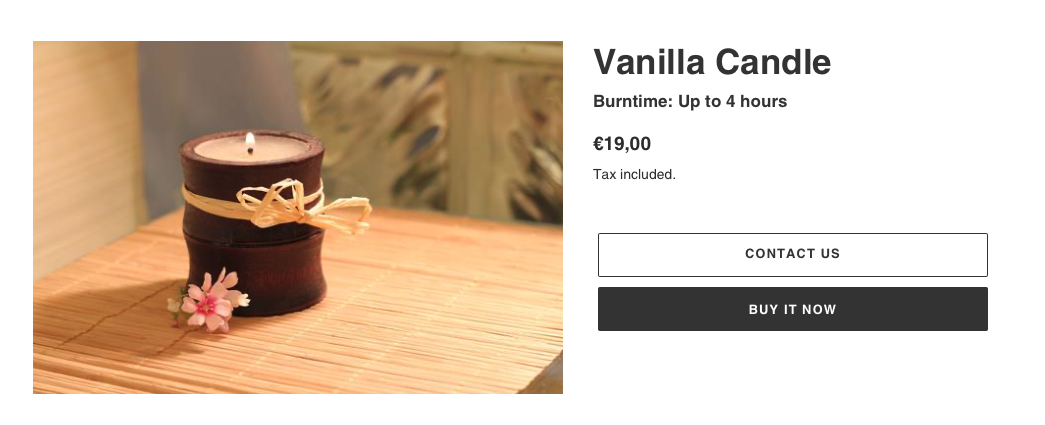
In our case, we’d like to render the metafield value (the burn time) under the product title. See the screenshot:
-
To render the metafield value, we’ll need to access the metafield object with the following syntax:
{{ product.metafields.namespace.key }}
For our example, the piece of code will look like this (you can find the namespace and key in the metafield definition.)
{{ product.metafields.my_fields.burn_time }}
-
You can wrap the dynamic metafield value into another element (such as h4 HTML tag as in my case). See the screenshot:
- Click save and preview any of the product, for which you’ve already filled in the metafield value.
NEWS Winter 2023! Merchants and developers wished for the feature for a long time and now it’s finally available – Shopify has introduced a new feature in the Winter 2023 release that allows for rich text formatting in metafield definitions. This means you can now apply basic text styling, such as bold and italics, to metafields. For example, on product pages, you can now use rich text instead of the multi-line text metafield type to make the text look nicer.
I hope this article helped you set up metafields for your products and hence render additional information on your Shopify store. If you have any further questions about metafields or any other Shopify issues, feel free to contact me.