How do I set up shipping rates for every additional item in cart?
When setting up shipping rates on Shopify, there are two default options, which you can use: rate based on item weight and rate based on order price. In many cases, these two options are sufficient for most of the merchants. However, some product types call for different set up of shipping charges. And that’s charging shipping cost for every additional item in the cart. E.g. Shipping one product costs 10 EUR, shipping two products costs 15 EUR, shipping three products cost 20 EUR, and so forth.
By default, Shopify doesn’t support this option. So, how to solve the issue without using any third-party app and without writing a single line of code?
What’s the main logic behind the solution?
The solution is very easy, however, it takes some time to set it up. Basically, you assign weight – 1kg – for each of the products. Then, you create shipping zones and start adding multiple shipping rates for them.
Shipping zone: Europe
Rate: Standard
| Minimum Weight |
Maximum Weight |
Price |
| 1 kg |
1.99 kg |
10 EUR |
| 2 kg |
2.99 kg |
15 EUR |
| 3 kg |
3.99 kg |
20 EUR |
…and so on.
This settings ensure that every additional item in the cart adds 1 kg to the overall order weight and increase the shipping costs accordingly.
How many rates should you create?
If you are running the store for some time, you already have information about the average number of products in one order and also information about the maximum number of products a customer bought (in one order) in the past. Using this information, you will know how many rates to set up.
To give you an example, imagine that the average number of purchased products in one order is one item and that there was one purchase of three items. So, I would set up rates for one item, two items and three items for each shipping zones. Then, I would set up another rate for four items and more. Important! Don’t forget to include the option when a customer buys more than x products!
Let’s set it up
Here is a detailed guide how to set up the solution.
Assigning weight to the products
If you have a couple of products, the easiest way is to export your products to CSV, open the file and fill in the weight. I recommend using Google Sheet for making changes in the file. For more information about how to work with the imported file, read one of my article How to solve this Shopify CSV file import error.
Alternatively, if you don’t have many products, you can use the bulk edit in Shopify.
Creating shipping zones & adding rates
Now, it’s time to set up the rates. Go to Shopify admin -> Settings -> Shipping and delivery -> Shipping section.
Then, click Manage rates, scroll down and create shipping zones (e.g. your country, continent, the rest of the world,…).
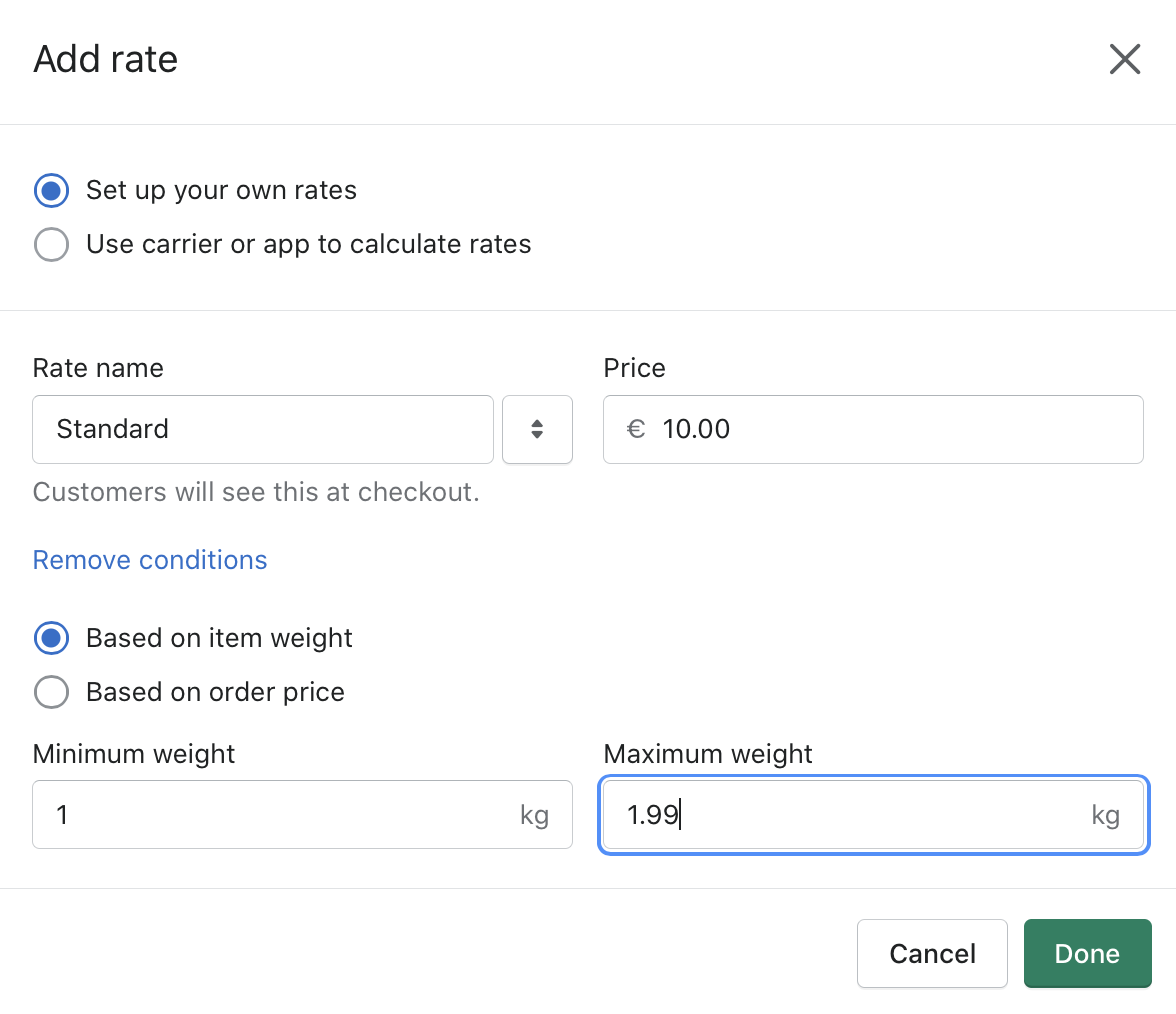
In the shipping zones, click Add rate. Choose “Choose your own rate”, name your rate (e.g. Standard), fill in the price and click Add conditions. Choose based on item weight option and set up the minimum weight and maximum weight according to the table above. (See the screenshot.)
Save the rate and continue adding new rates.
The disadvantage of this solution is that you have to set up the rates manually for all of the shipping zones. However, you set it up once, can edit it anytime and don’t need to use any third-party app!
I hope this solution will help you set up the shipping rates for your store. However, if you’re already using a carrier app or any other carrier integration, check out if the app can set up the additional shipping rates for you.