How to add a customer note on product page?
If you’re selling products, which call for some kind of customization (such as a custom inscription, name, or else), you are probably searching for a solution how to add a customer note on your product pages. A customer note will make it easy for your customers to inform you about their required custom text without messaging you after placing the order.
Follow this guide and have the customer note feature up and running without installing any app. However, keep in mind that some basic coding skills are required.
1. Line item properties will make the magic
First of all, let’s explain what line item property means. Line item properties are used to collect custom information for products. The information can be collected from the customer on the product page, rendered in the cart, checkout page (customer will see the information in both cases) and in the end, the information can be displayed in the order overview as well (visible for you, the merchant).
Line item properties can have various form fields: text — short, text — long (ideal for customer note), radio buttons, drop-down select, checkbox and checkbox group.
2. Use the Shopify Line item property generator
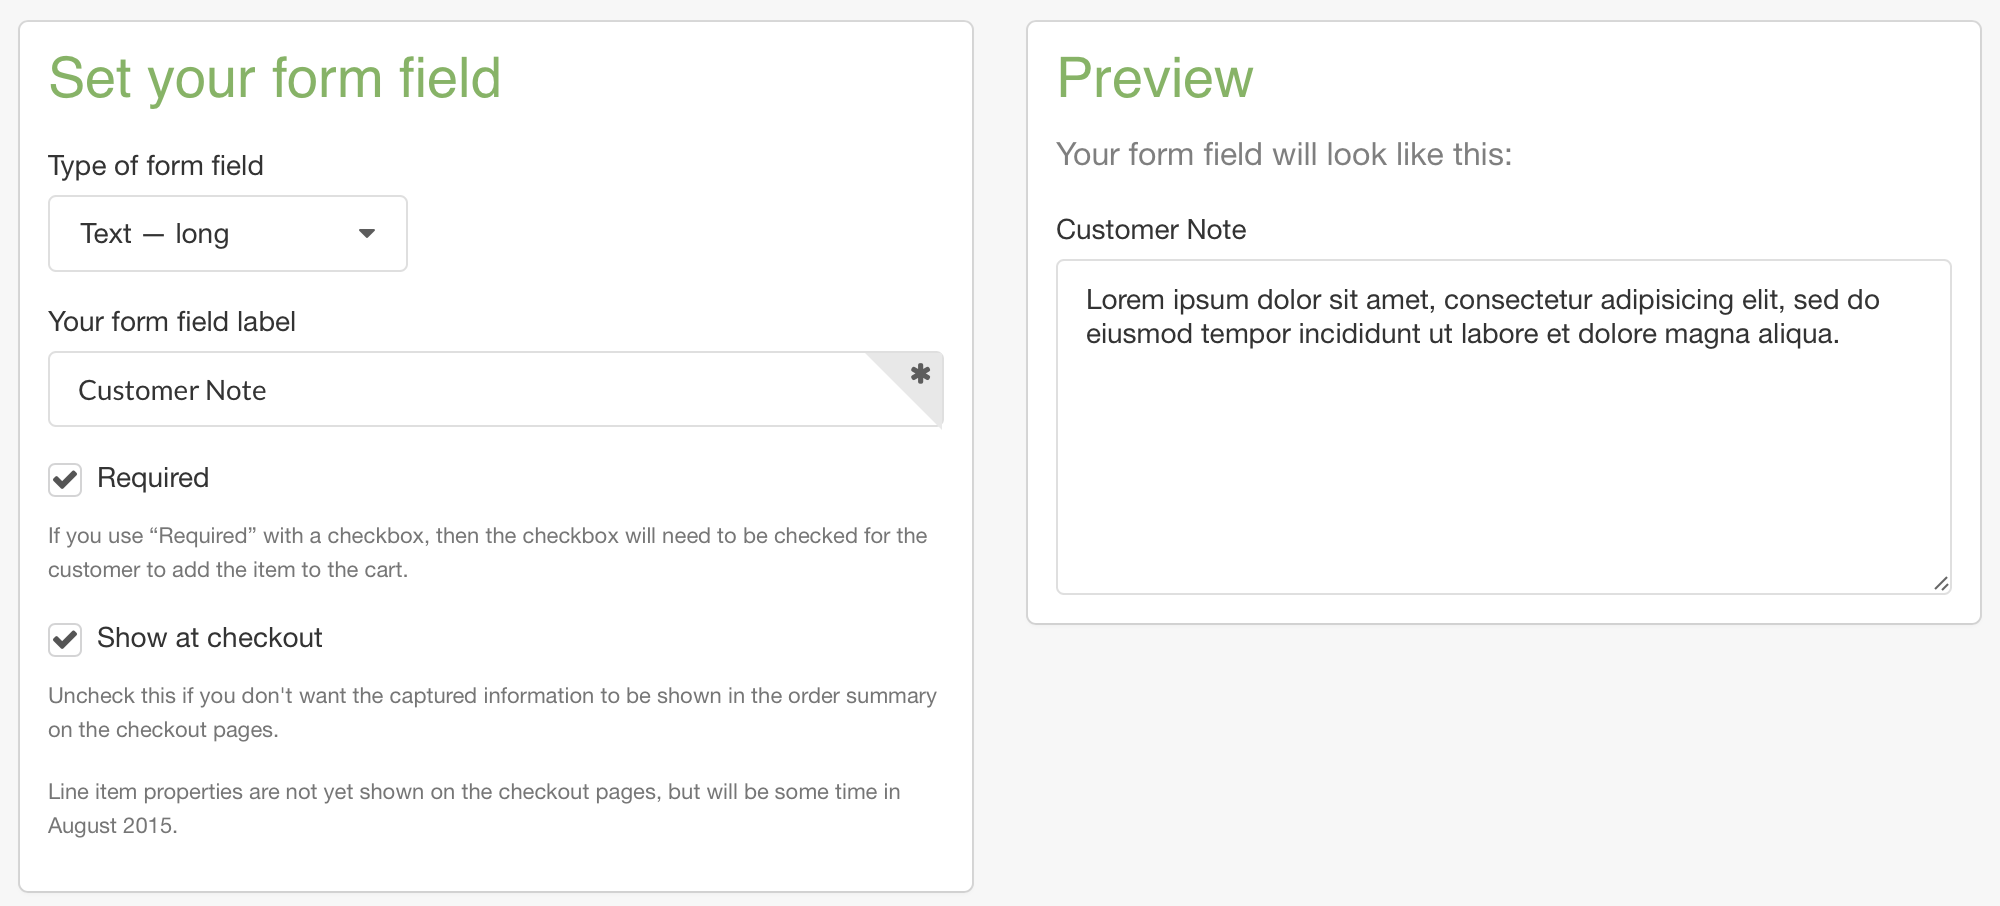
Shopify makes the entire process of creating the customer note much easier by providing us with a line item property generator. This generator helps you generate the code without writing it on your own. Follow the steps:
- Visit the site and in the “Set your form field” section, choose text – long.
- Name your form field label (e.g. Customer note)
-
Decide if the form field is required and if you wish to show the information at checkout (recommended).
-
Scroll down and grab the code. The code might look like as follows:
 <div class="line-item-property__field">
   <label for="customer-note">Customer Note</label>
   <textarea required class="required" id="customer-note" name="properties[Customer  Note]"></textarea>
 </div>
Note: I recommend changing from <p></p> element to <div></div> element due to styling reasons.
3. Edit the code in your liquid file
- Now, head over to your Shopify admin.
- Go to Online store and click the “Actions” dropdown. Click edit code.
- Find the main product liquid file, e.g. in the Debut theme, the file is called product-template.liquid
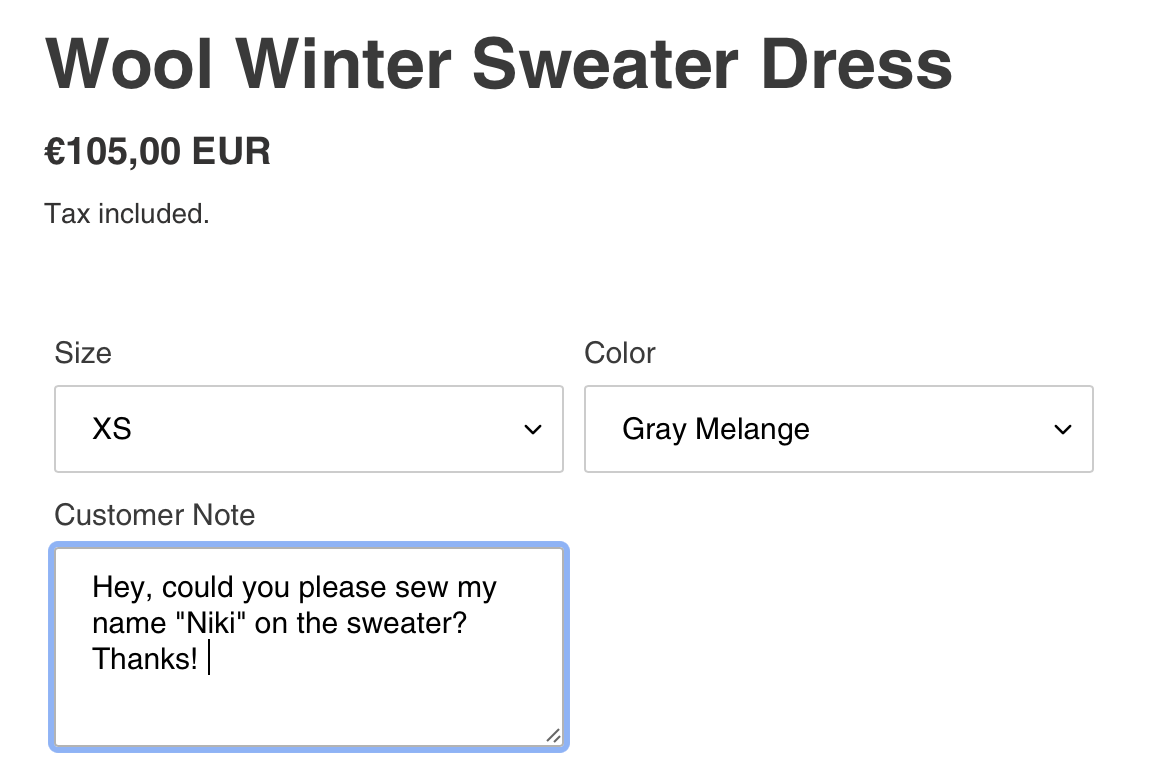
- Find the form section and decide in which part of the product page you would like to render the customer note (it has to be within the form section).
- In my case, I decided to render the customer note under the size and color picker.
- Insert the code. You will need to add classes so that the customer note fits the product page layout.
- After tuning the styling, make sure the customer note renders in the cart and on the checkout page.
- Create a testing order to see if the information also renders in the order overview.
Now, it’s done! Thanks to this small feature you enable your customers to customize your products (such as adding an inscription, name, age, or else) without the need of messaging to each other about that or installing an app to do it for you.
I hope you find this article helpful – if anything isn’t clear, let me know. I’ll be happy to assist you further.